Create your first onboarding plan
Turn a role description and your existing SOPs into a complete, AI-drafted onboarding plan you can review, refine, and publish for new hires.
Your onboarding plans are the heart of boardingon.ai. This guide shows you how to turn a role description and your existing material into a complete, AI-drafted plan you can review, refine, and publish — the fastest way to get a new hire from day one to fully self-sufficient.
A plan belongs to a role, not to a person. You build it once for a role like Customer Support Rep, then invite as many hires into it as you need.
Step 1 — Start a new job role
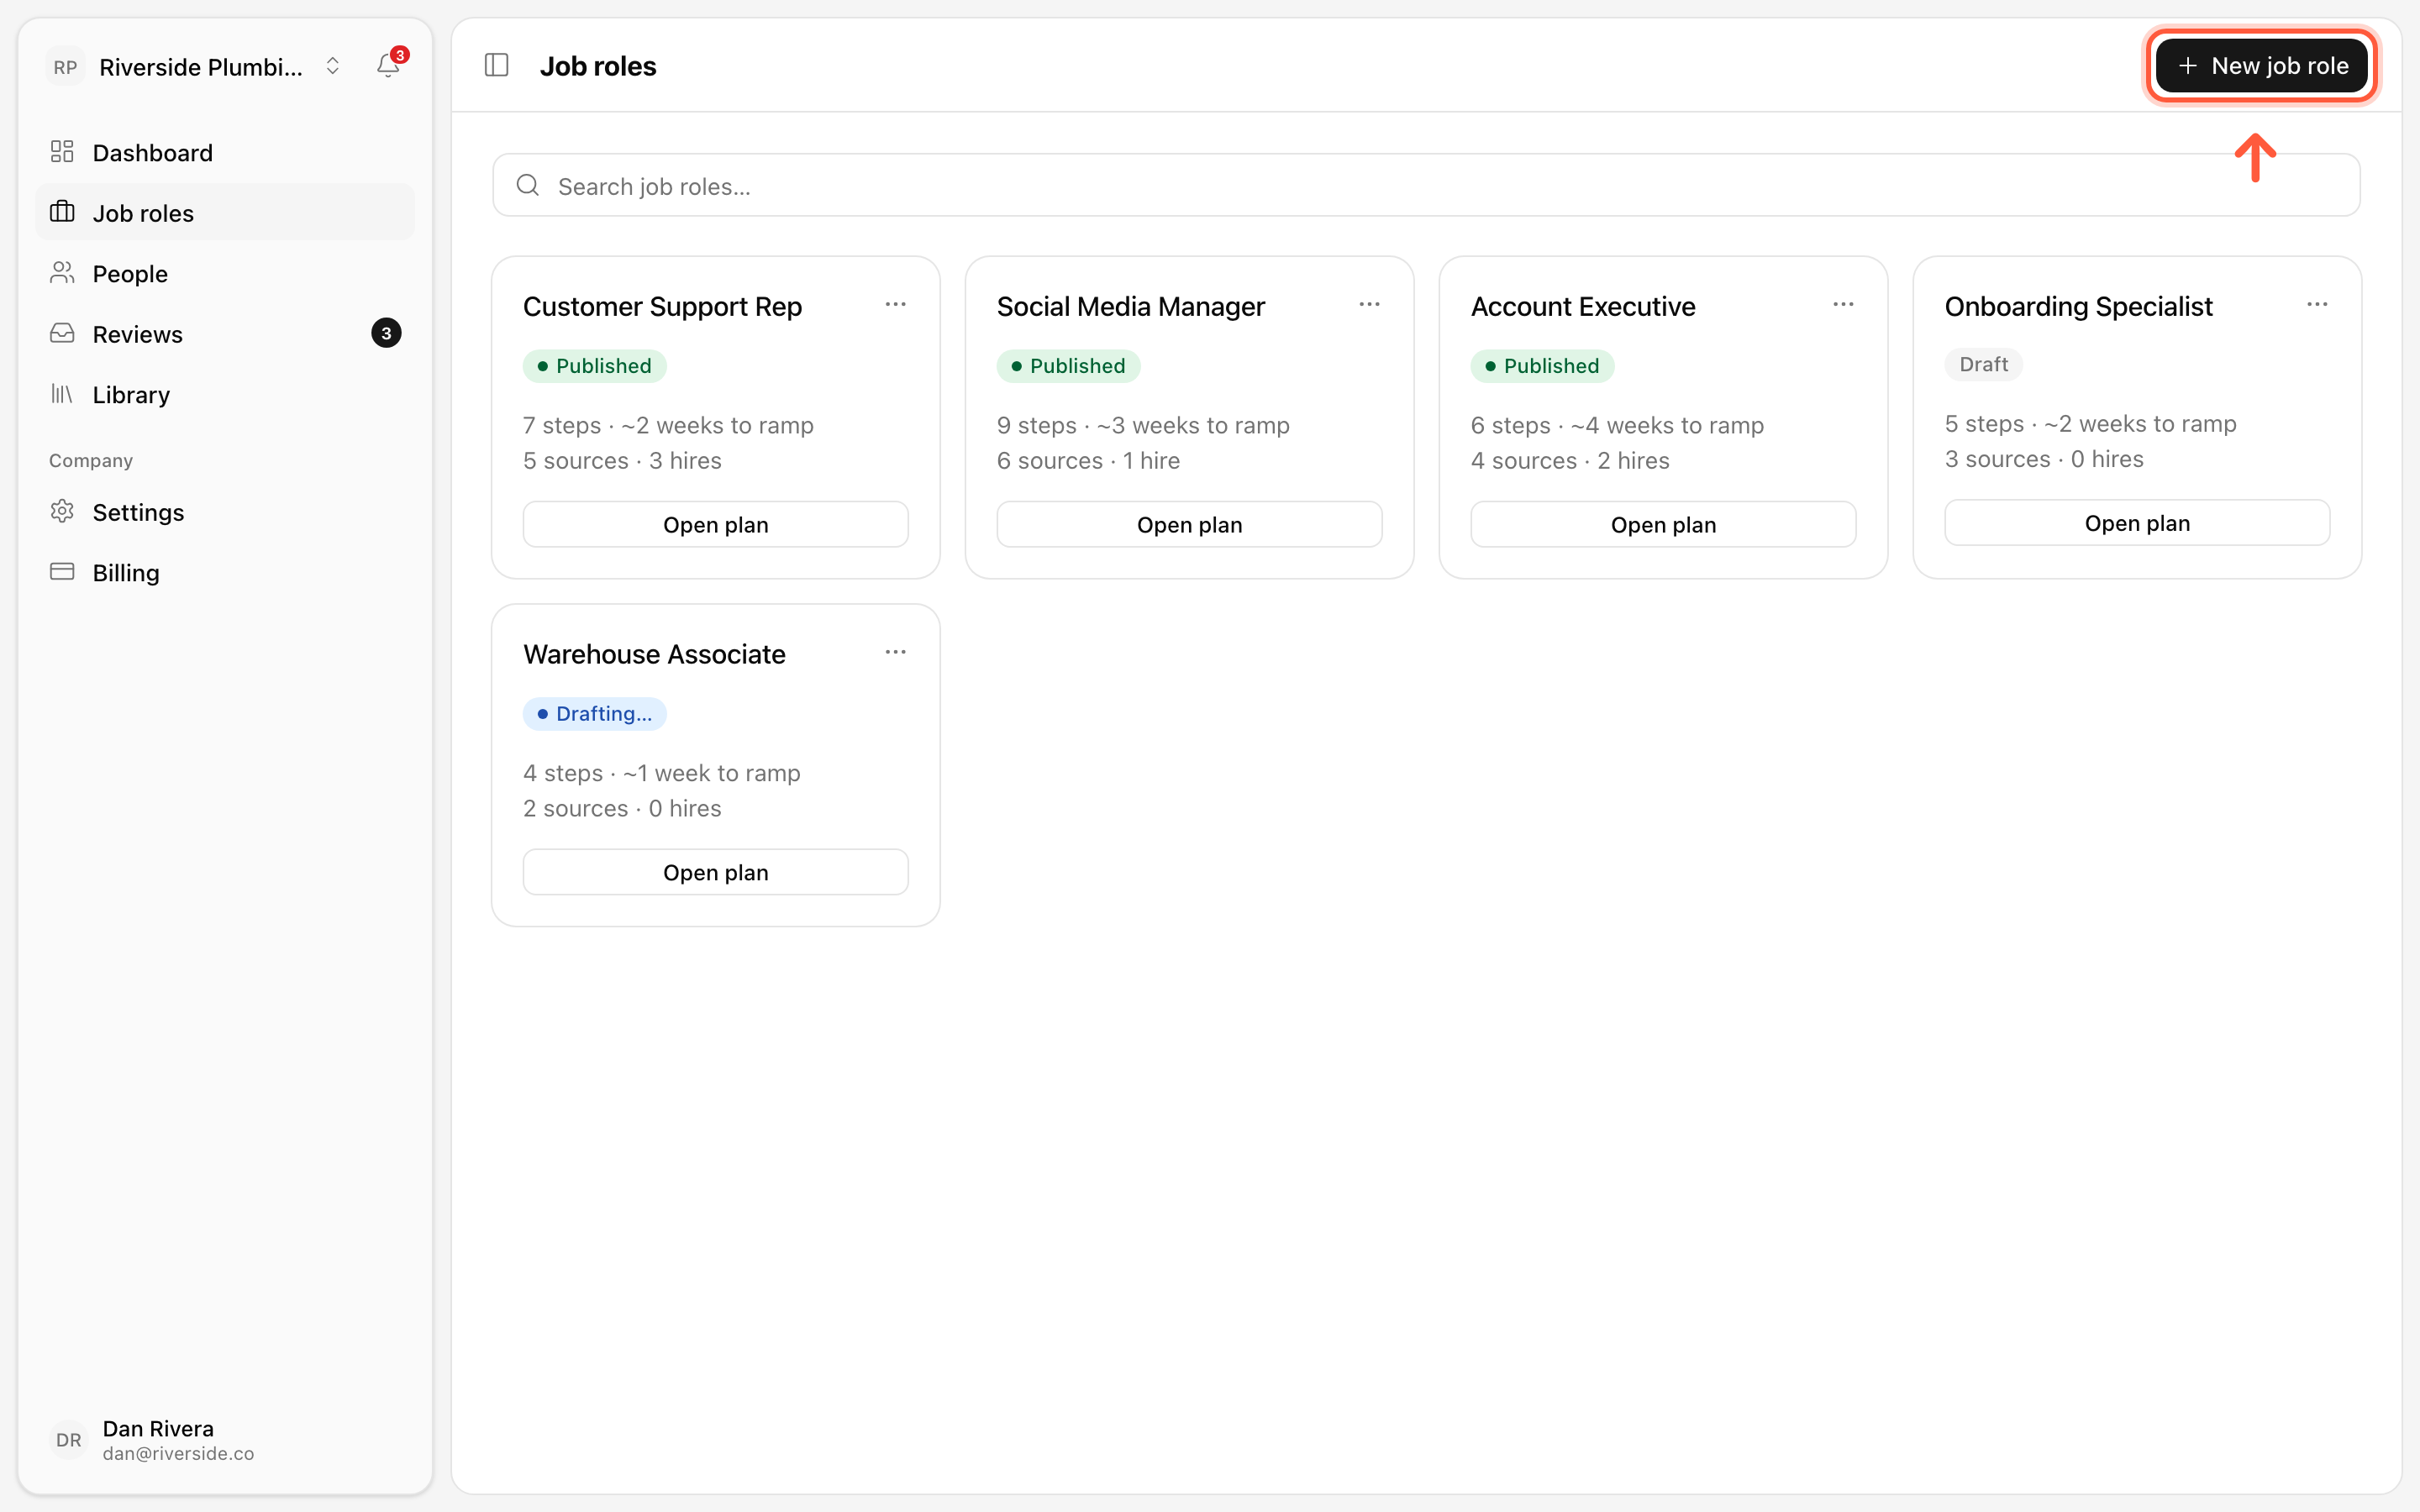
In the left nav, go to Job roles. This is where every role you onboard for lives — the ones you've already published, plus any drafts. Click New job role in the top-right corner.
Step 2 — Tell the AI about the role
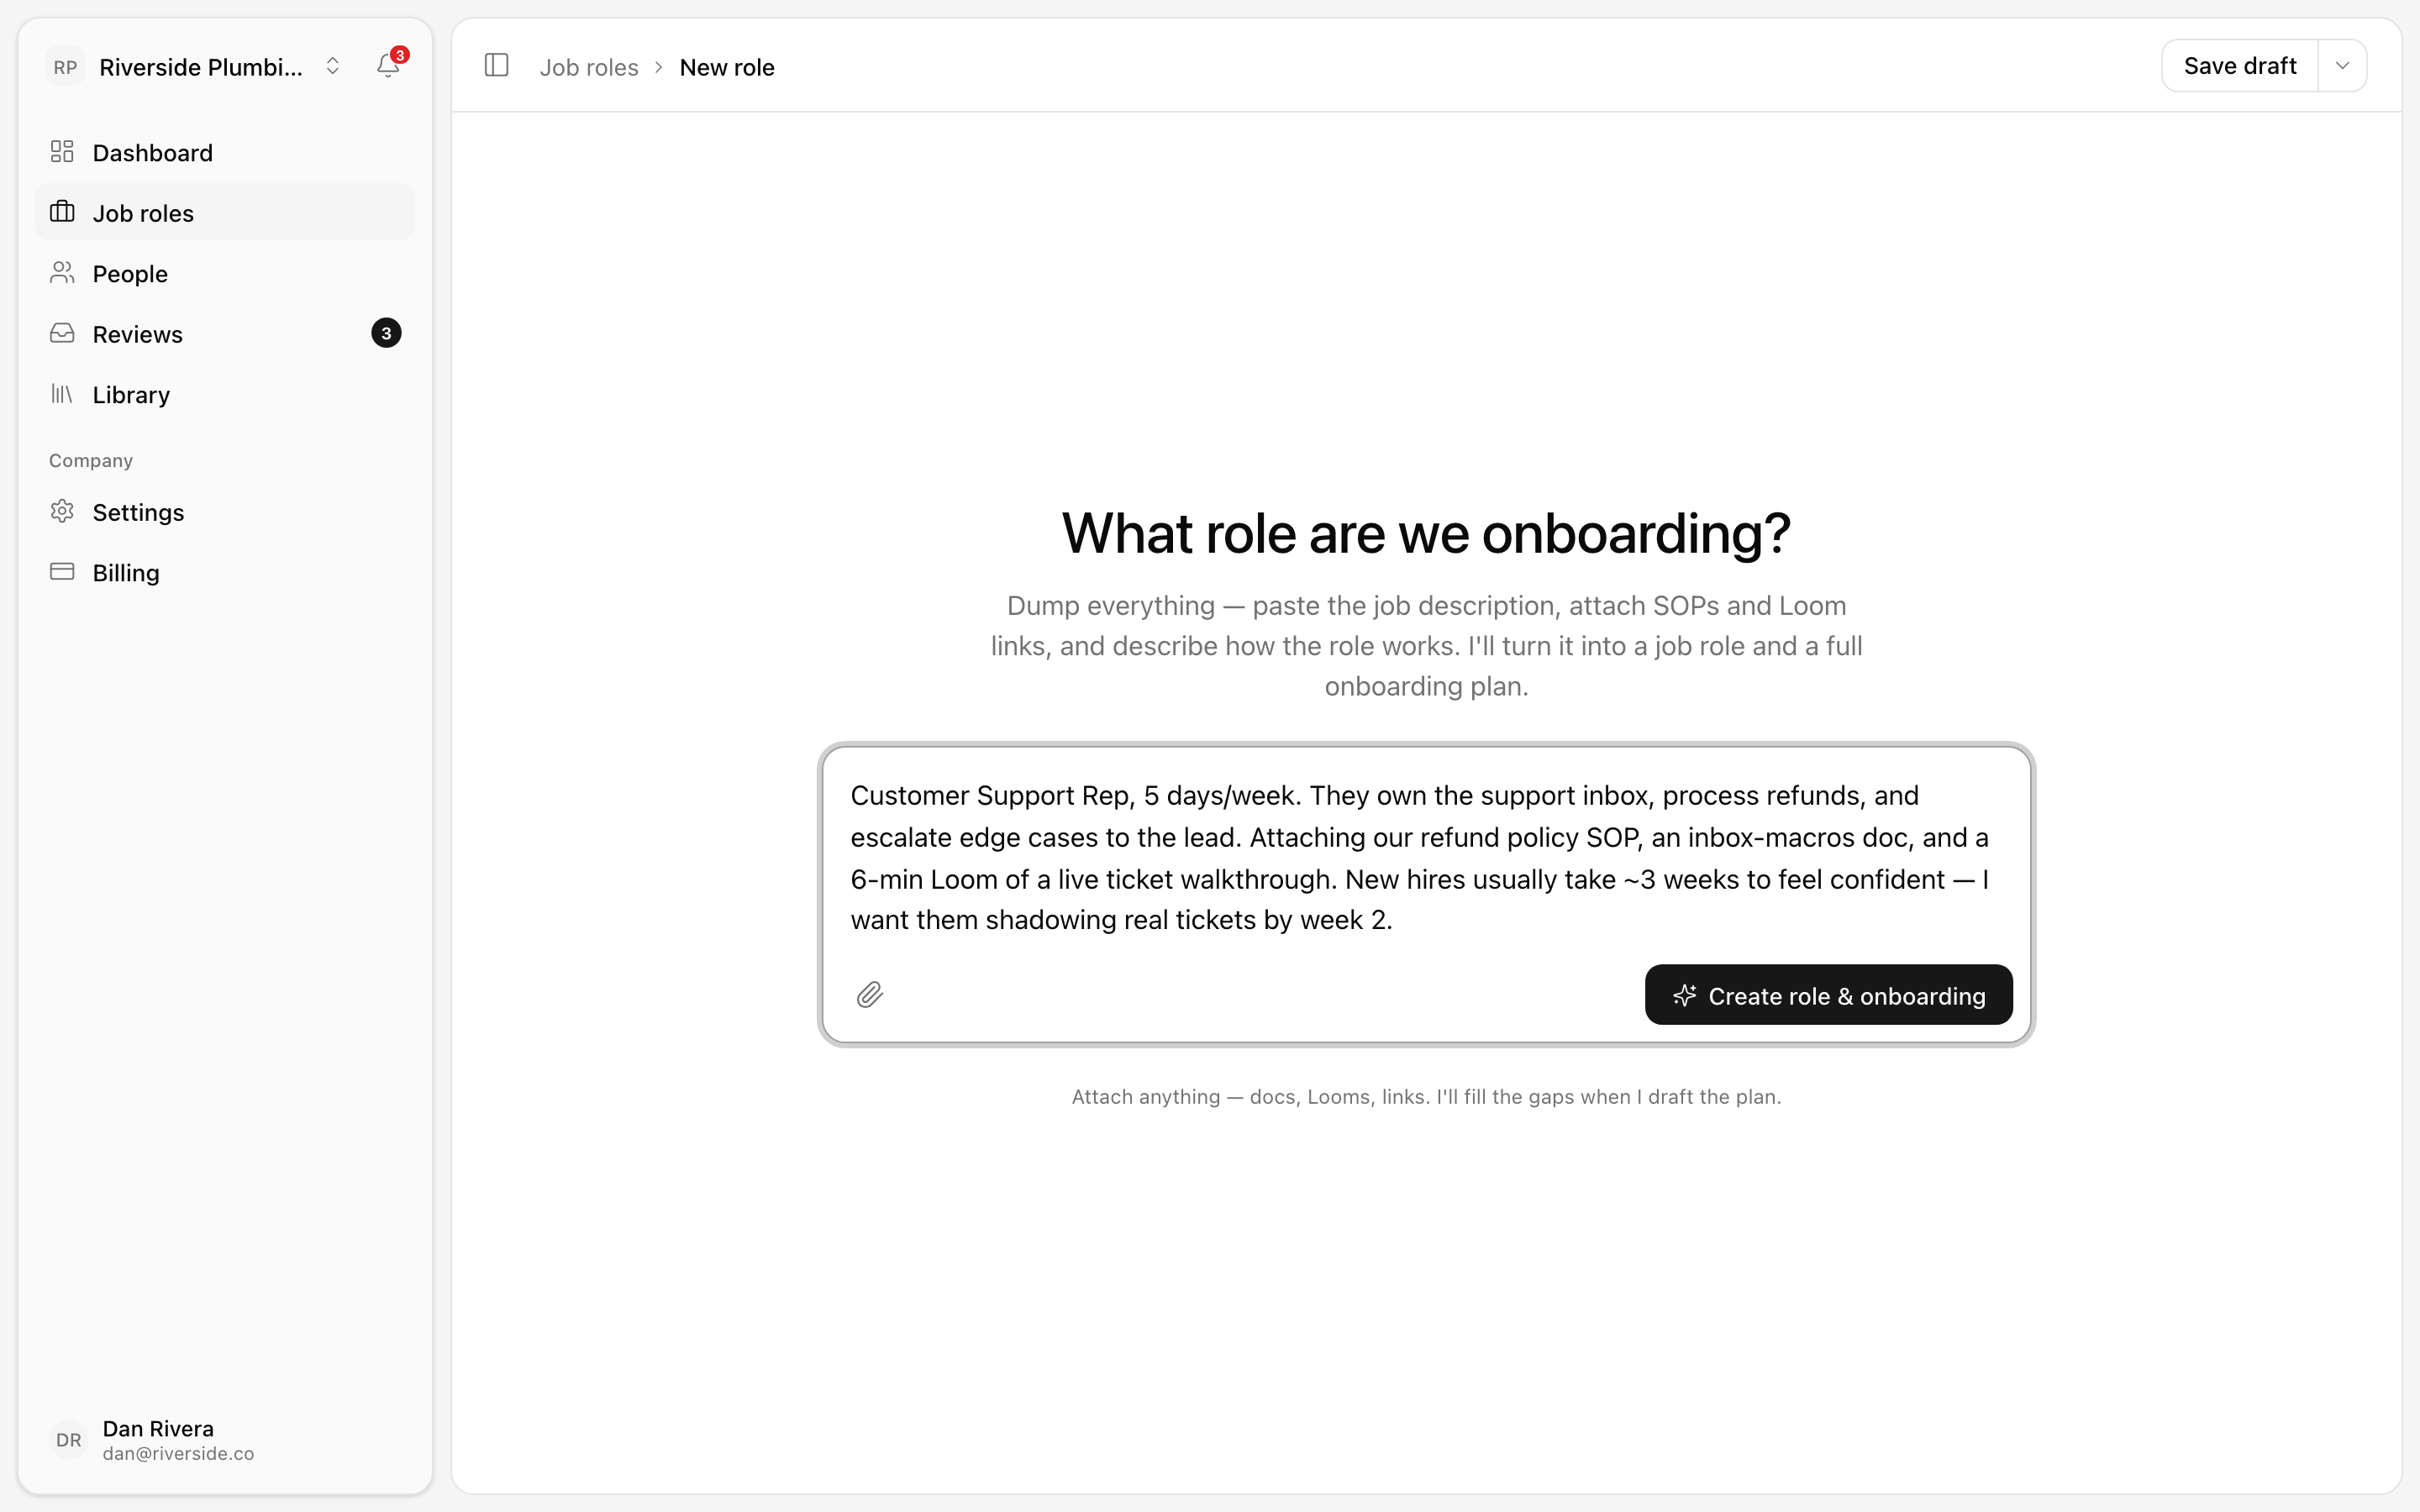
You'll land on the "What role are we onboarding?" screen — one big box. Don't overthink it. Dump everything you know: paste the job description, describe how the role actually works day to day, and attach your existing material. Use the paperclip control to add SOPs and Loom links.
The more context you give, the better the draft. Something like:
"Customer Support Rep, 5 days/week. They own the inbox, process refunds, and escalate edge cases…" — then attach your refund policy and a couple of Looms.
When you're done, click Create role & onboarding.
Tip: Attach the real documents your team already uses. The AI links them to the right steps, so your hire reads the actual SOP at the moment they need it — not a generic summary.
Step 3 — Review the drafted plan
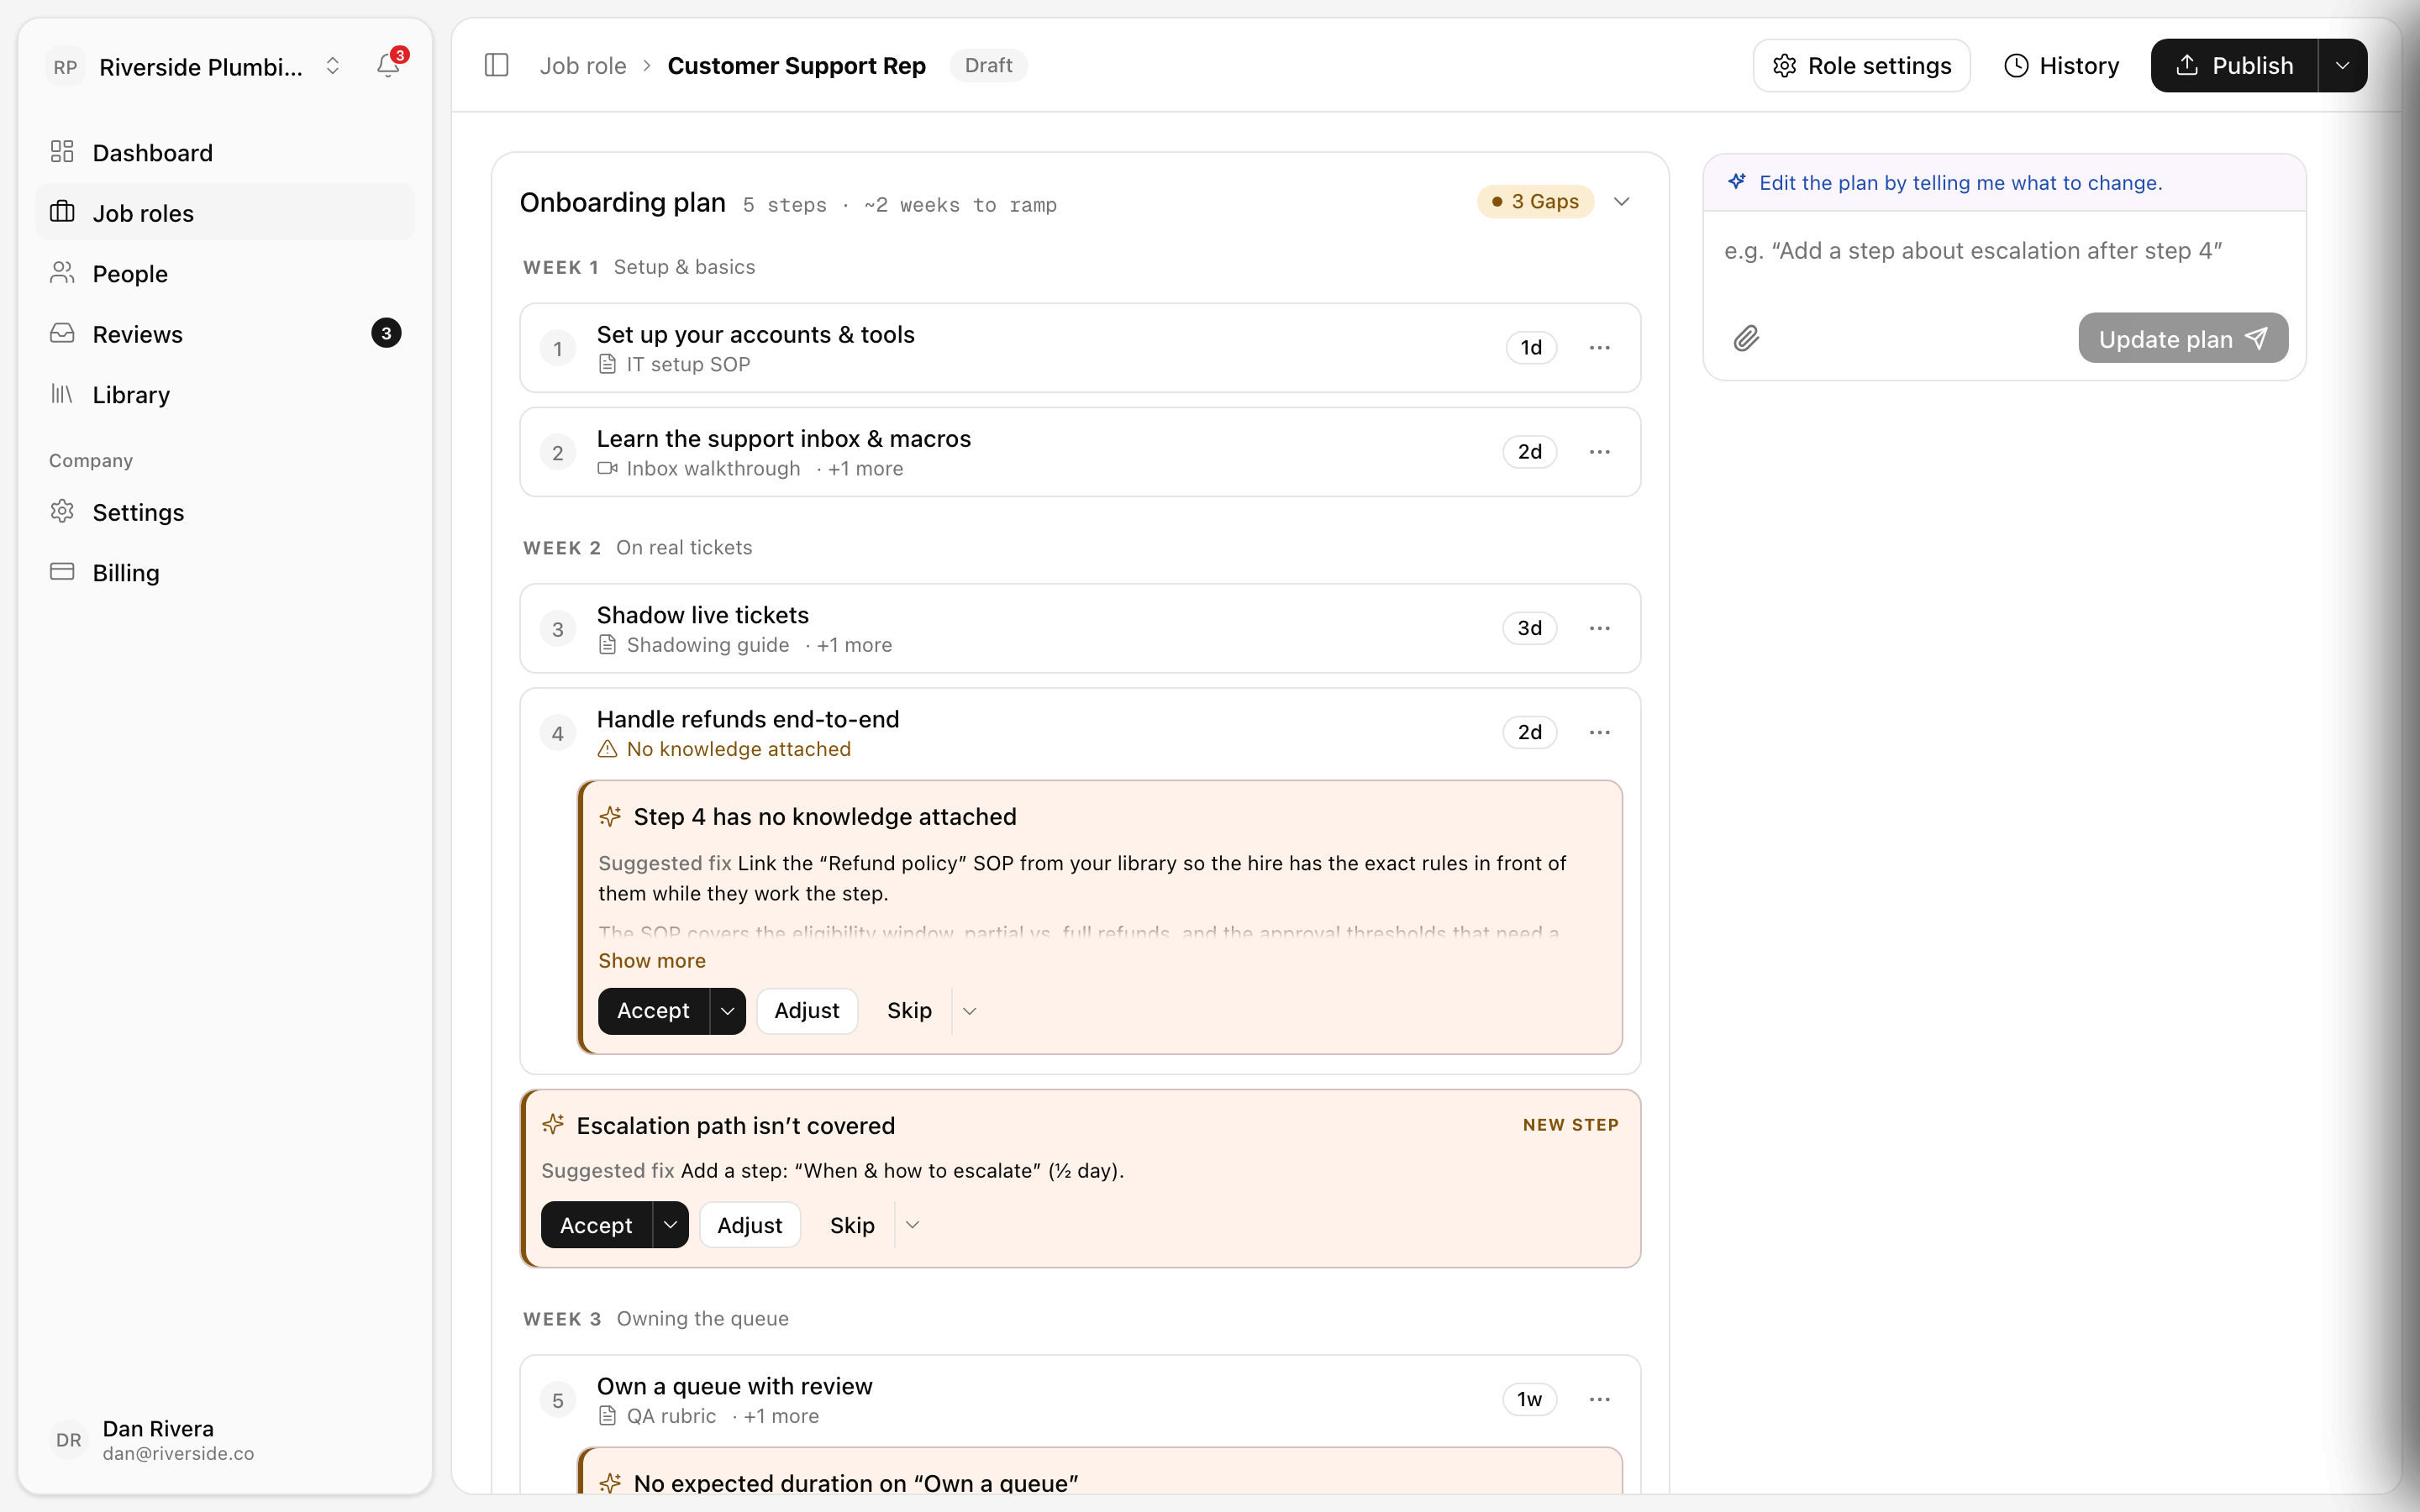
In a moment, the AI drafts a full onboarding plan, organized into weeks — for example, Week 1 for setup and basics, Week 2 on real tickets. Each step has an estimated duration, and any SOP or Loom you attached is linked to the step it belongs to. A summary at the top reads something like "Onboarding plan · 5 steps · ~2 weeks to ramp."
Read it through as if you were the new hire on their first morning.
Step 4 — Close the gaps
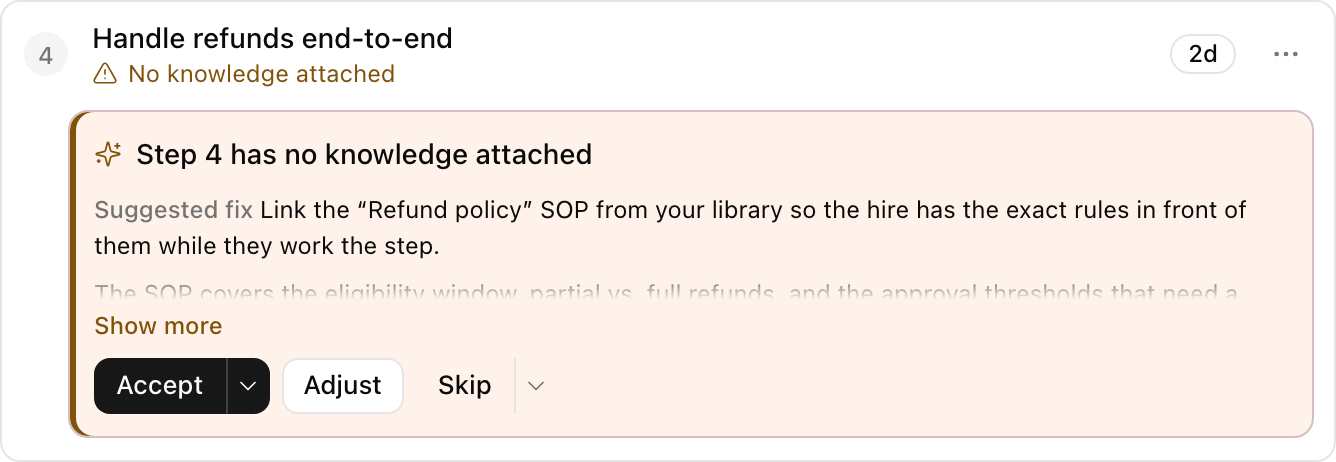
The AI also reviews its own draft and flags what's missing, shown as an "N Gaps" badge. Each gap is a card with a suggested fix and three buttons:
- Accept — apply the suggested fix as-is.
- Adjust — change the suggestion before applying it.
- Skip — dismiss it if it doesn't apply.
For example: "Step 4 has no knowledge attached → link the Refund policy SOP," or "Escalation path isn't covered → add a step."
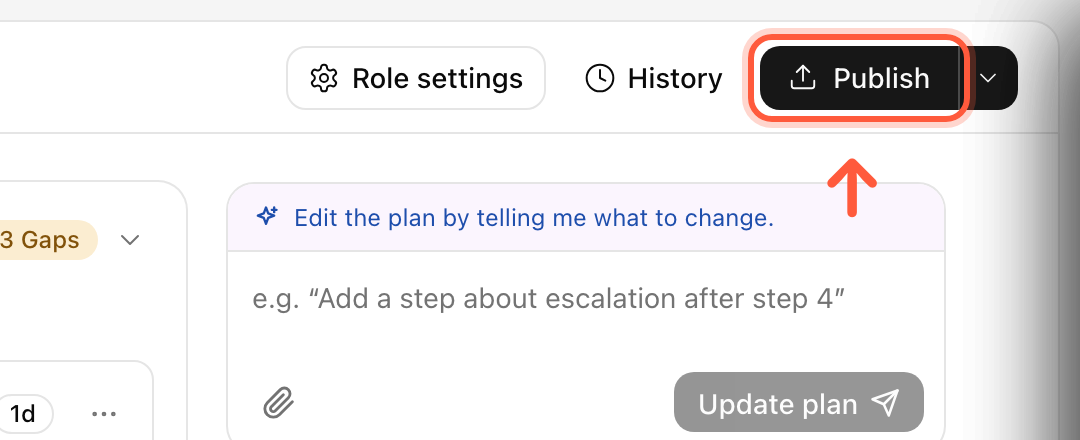
You can also refine the plan in your own words. Type an instruction into the "Edit the plan by telling me what to change" box — for example, "Add a step about escalation after step 4" — and click Update plan.
Step 5 — Publish
When the plan looks right, click Publish in the top-right. A published plan is what new hires receive when you invite them into this role.
Not ready yet? Click Save draft and come back later — your work is kept, and the role stays in your Job roles list until you publish it.
What's next
Your plan is live. Now bring someone into it — see Invite a new hire.